Upgrading Ram on Late 2015 iMac Retina
Back in 2017 I purchased a refurbished late 2015 iMac MK482LL. It’s still going on strong for what I use it for – mainly development. It came with a 27″ screen, 2TB Fusion drive, and an Intel i5 3.3GHz quad-core CPU. The Fusion drive truly makes a difference and the 2TB model has a larger 128GB Flash component over the 1TB version which only has 24GB. It’s not as fast as a SSD hard drive but better than HDD. There isn’t much you can upgrade. Ram is probably the most accessible part that can be upgraded. So I did.
I picked up a 16GB (2x8GB) kit from Amazon. Ram has been crazy expensive for a while. I’m not sure if the $99 price for DDR3 SODIMM PC3-14900 (1867MHz) is a good price. I mean it is DDR3 but the laptop size. Though the OWC brand is a reputable brand.
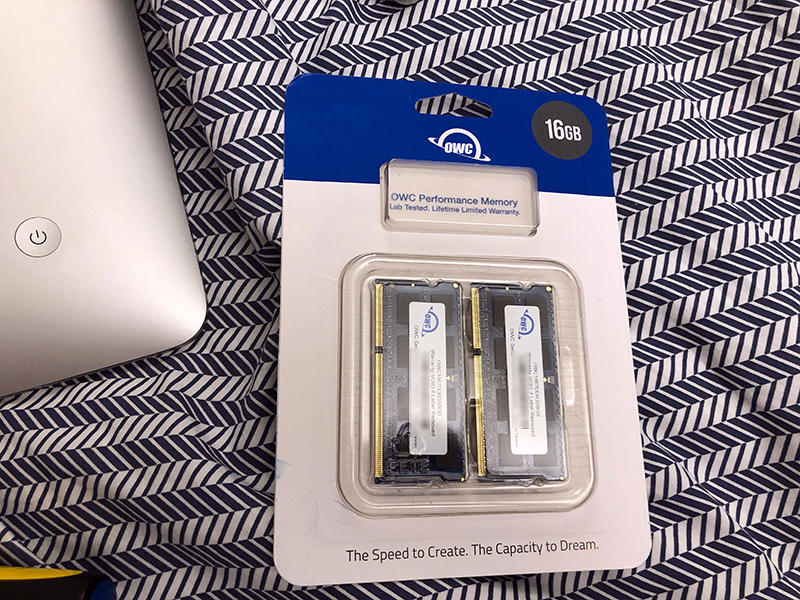
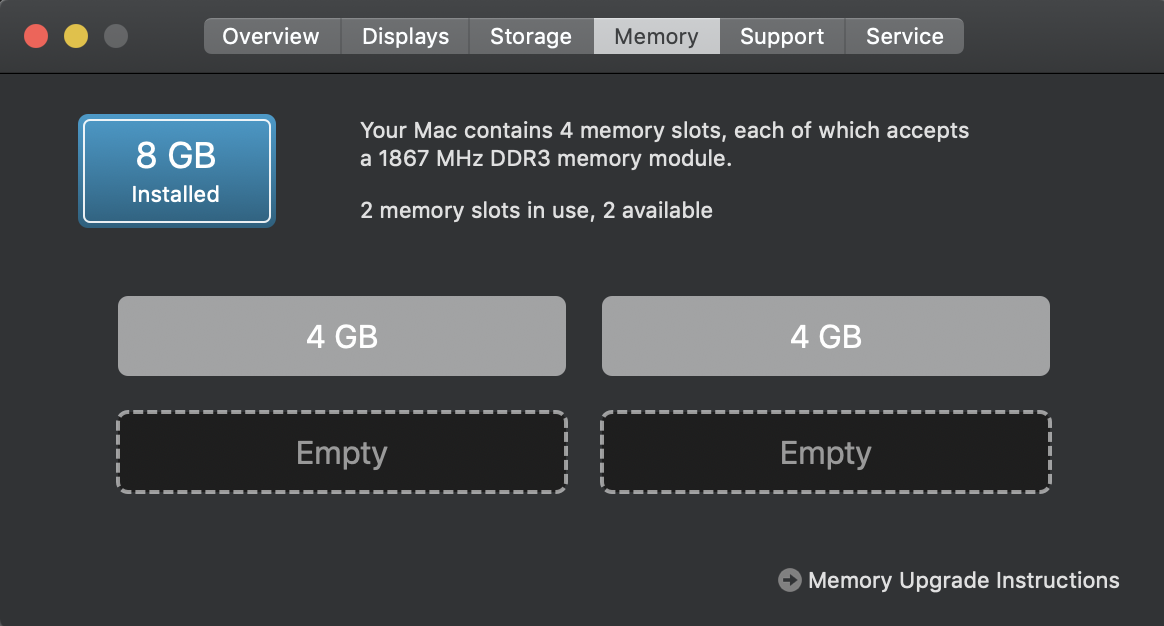
The iMac came configured with 8GB of Ram installed (2x4GB). The specs are pretty much what I mentioned above – DDR3 SODIMM PC3-14900 (1867MHz). The iMac model I have seems to go as high as 64GB. It has 4 DIMM slots. I’ve seen people report of 16GB per slot to work.
The 16GB price was within budget considering I didn’t need the upgrade, but it would be nice to add some more Ram. I run VMs for development. Currently, they are configured to use 2GB of Ram per VM. I want to start running more than 1 at a time or increase the Ram of the VM and have it do more.
Initially, I was only going to get another 8GB (2x4GB) kit to match what was already installed. Generally, you shouldn’t have issues with mismatching Ram kit sizes so I went for the larger kit. The main thing to remember is if the performance is different, it will run on the lowest spec – the entire series. This should work mainly on consumer hardware. You may get different results with enterprise or if using some obscure hardware.
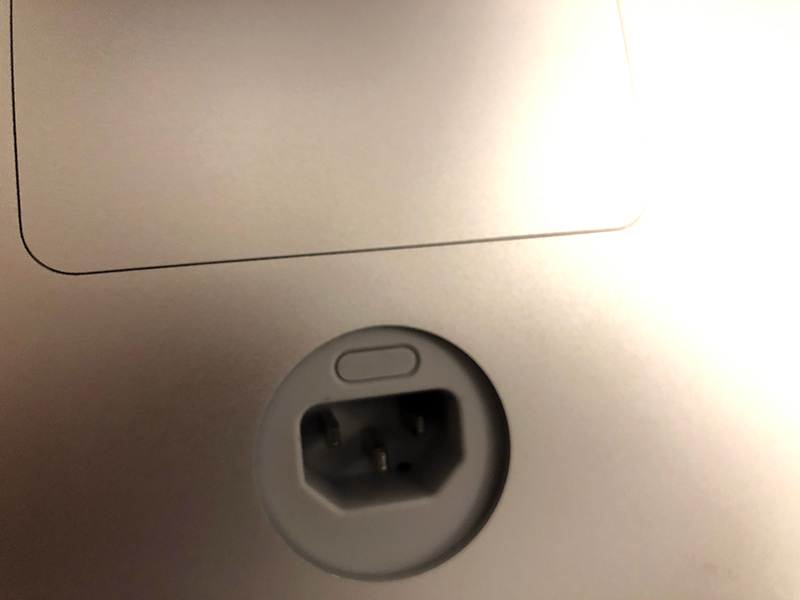
Unplug you iMac and lay it on its front. In the back you’ll find a button right above the power plug.
Right above that you’ll see the Ram compartment. When you press that button the compartment lifts up. Just remove it.
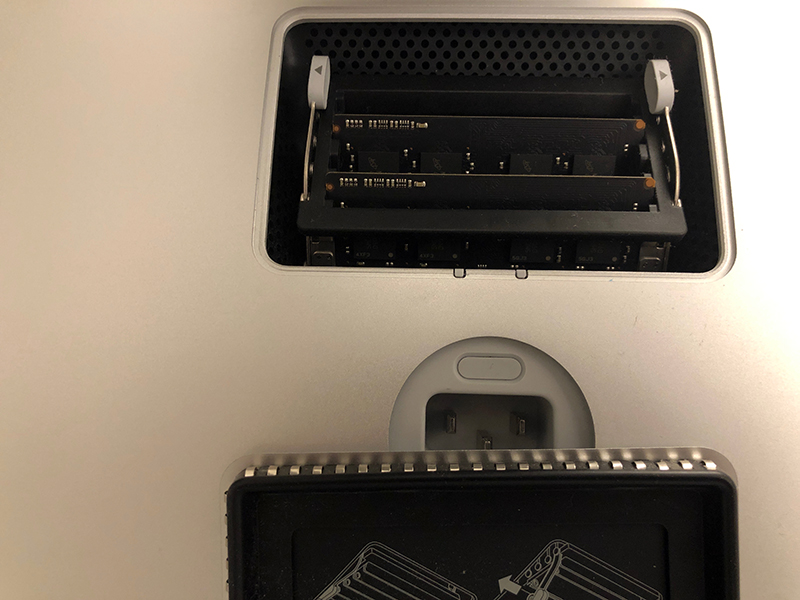
Behind the Ram compartment you’ll see a diagram for the next step. Essentially, you just move the lever on each side outward and it will move the Ram slots up so you can slide the new Ram in. You will notice that the Ram sticks installed skip a slot. That is done on purpose. Do not move them next to each other. Just leave it as is and install the new Ram in the available slot.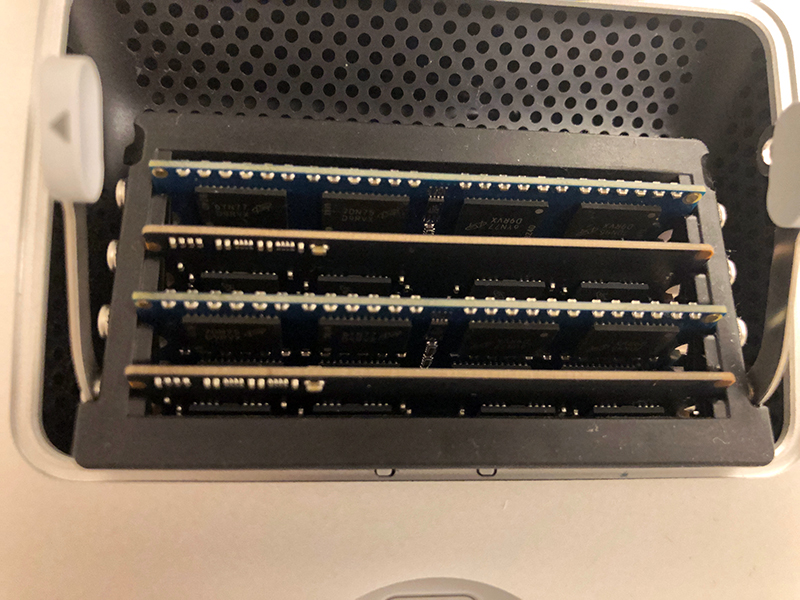
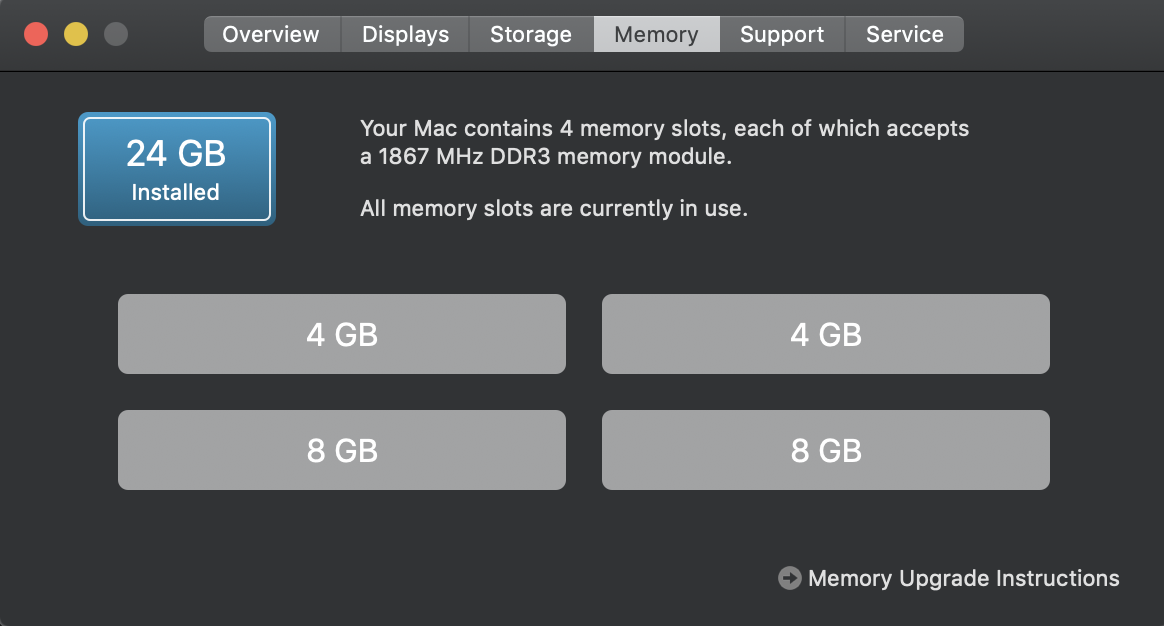
Push the Ram holder back in and make sure the levers lock in. Replace the cover and that should be it. Plug in the iMac and check the About This Mac and the new Ram should register. In my case 8GB + 16GB = 24GB.
Fairly easy to do. I am unsure of the new iMac and if the Ram is upgradeable. Apple tends to change their design and remove features like hardware upgradeability.


I currently have 32 GB (4×8 GB), I see this model iMac can handle a total of 64 GB memory but I wonder if I would really see that much improvement for the cost?
if you do a lot of memory intensive activities, then go for it. i only upgraded my RAM because of virtual machines. run all of your applications and see how much RAM you have left. if you’re left with about 10%, it might be a good indicator to upgrade. although, for the price, maybe consider a new machine with newer RAM? just a thought.
At the current price of ram and my computing needs, I was thinking along the same lines. I would be farther ahead to replace my iMac with a newer version. Thank you for the input.