I’m not sure when this whole backend vs frontend battle started in my head. But I’m mainly a backend developer. Ever since I started development, I mainly focused on data structure and coding. I rarely paid attention to any of the frontend elements. My main focus were to ensure that my code worked as expected. UI/UX was secondary. Even until now. But lately it seems it’s becoming inevitable. There are some requirements of the application that can only be presented using JavaScript – at least in a more efficient manner and more pleasant to the user.
I have struggled to find resources to learn implementation of modern frontend architecture. I would find some but it ends up taking me into a rabbit hole where I would have to start downloading many other plugins. If I get stuck, I would have to look for more resources but I’m restricted to the plugins that I started off with. Sometimes I would find some but the development process is not the same as the previous resource. I would then have to start over. It usually is a lot of time wasted and I tend to revert back to backend development.
I remembered I purchased a lifetime subscription from Laracasts and found a series on InertiaJS. After the first two videos I was sold. At the time of writing, I believe the videos are free without a membership. You can check it out at https://laracasts.com/series/build-modern-laravel-apps-using-inertia-js.
Let’s begin by installing a fresh copy of Laravel. Currently, I will be using v8. I will use composer to download and install it.
# install laravel
composer create-project laravel/laravel new_app
cd new_app
You are now inside your new Laravel application. From this point, you have multiple ways of running your application locally. My choice is to use Laravel Sail. Once up and running, you can open your browser to http://localhost or http://localhost:8000 – could vary depending on how you are running your environment.

Next we will install InertiaJS. You can view their installation document at https://inertiajs.com/server-side-setup. We will be using composer once again. Optionally, you can install tailwindcss – https://tailwindcss.com/docs/installation.
# server-side installation
composer require inertiajs/inertia-laravel

# client-side installation
npm install vue@next
npm install -D @vue/compiler-sfc
npm install @inertiajs/inertia @inertiajs/inertia-vue3
npm install @inertiajs/progress

npm install -D tailwindcss
npx tailwindcss init
# modify tailwind.config.js
module.exports = {
content: [
"./resources/**/*.blade.php",
"./resources/**/*.js",
"./resources/**/*.vue",
],
theme: {
extend: {},
},
plugins: [],
}# modify resources/css/app.css
@tailwind base;
@tailwind components;
@tailwind utilities;The next file to modify is resources/js/app.js. Then npm run watch.
# resources/js/app.js
import { createApp, h } from 'vue'
import { InertiaProgress } from '@inertiajs/progress'
import { createInertiaApp } from '@inertiajs/inertia-vue3'

InertiaProgress.init()

createInertiaApp({
    resolve: name => require(`./Pages/${name}`),
    title: title => `${title}`,
    setup({ el, App, props, plugin }) {
        createApp({ render: () => h(App, props) })
            .use(plugin)
            .mount(el)
    },
})
Modify webpack.mix.js by adding .vue() and requiring tailwindcss as show below. Using .version(), it enables file hashing every time the code is compiled. This helps with cache busting. You don’t need it but it’s helpful.
# webpack.mix.js
const mix = require('laravel-mix');

mix.js('resources/js/app.js', 'public/js')
    .vue()
    .postCss('resources/css/app.css', 'public/css', [
        require("tailwindcss"),
    ])
    .version();
We can use npx or npm to watch any file changes.
# use npm
npm run watch

# or you can use npx
npx mix watch
If you get an additional dependencies message, just run the command again.

When it compiles, you may run into an error.
ERROR in ./resources/js/app.js 7:11-43
Module not found: Error: Can't resolve './Pages' in '/var/www/html/resources/js'

webpack compiled with 1 error
This is because you need to create the Pages folder or whatever name of the directory.
mkdir -p resources/js/PagesNext, we need to get the inertia middleware.
php artisan inertia:middleware

# edit app/Http/Kernel.php and add the following to $middlewareGroups
\App\Http\Middleware\HandleInertiaRequests::class,
If there are no errors when compiling your frontend, you should be good to go.
Let’s create a new view using blade template in Laravel.
# resources/views/app.blade.php
<!doctype html>
<html class="no-js" lang="">

<head>
    <meta charset="utf-8">
    <title></title>
    <meta name="description" content="">
    <meta name="viewport" content="width=device-width, initial-scale=1">

    <link rel="stylesheet" href="{{  mix('/css/app.css') }}">
    <style>
        .gradient {
          background: linear-gradient(90deg, #3336d4 0%, #ffffff 100%);
        }
      </style>
</head>
<body class="leading-normal tracking-normal text-white gradient" style="font-family: 'Source Sans Pro', sans-serif;">
    <section class="p-8">
        @inertia
    </section>

    <script src="{{  mix('/js/app.js') }}"></script>
</body>
</html>
Next, let’s create a vue page.
# resources/js/Pages/Index.vue
<template>
    <h1 class="text-3xl">Hello World</h1>
</template>

<script>
    export default {};
</script>
Now let’s modify our route to display our index page.
# routes/web.php
Route::get('/', function() {
    return inertia('Index');
});
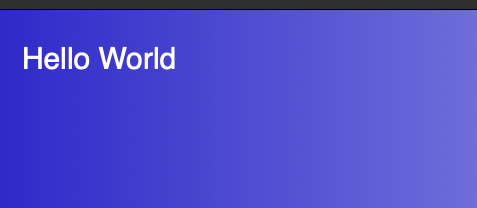
Open your browser and visit the “home” page. You should get a page that displays our “Hello World”.

You are now using InertiaJS and VueJS within a Laravel application. The Laracasts tutorial is easy to follow, even I can do it. I’ve mainly been a backend developer but so far I’m able to incorporate this new technology onto my existing and future projects. I am very excited and can’t wait to continue to learn.
Leave a Reply