Using USB SSD on 2014 MacMini
Best Buy dropped the Mac Mini price by $100. Open-box versions got an additional 10% off. So the low-end MGEM2LL/A version was as low as $355. I had a $40 gift card, so I figured why not. I needed an Apple desktop at home anyway to replace a broken one from 2007 MB138LL/A. This Mac Mini has the following specs.
- Intel i5-4260U 1.4GHz with up to 2.7 GHz turbo boost
- 4GB LPDDR3 1600MHz ram (soldered)
- I’m not sure if all models come with Hitachi HTS545050A7E362, but mine did. It’s 5400 RPM and 500GB storage. Yuck!
- Intel HD Graphics 5000 with 1.5GB VRAM. I’m using a LG Ultrawide 34″ monitor displaying at 3440 x 1440 @50Hz via HDMI.
- It has 4x USB3.0 ports and 2x Thunderbolt2 ports.
- Bluetooth 4.0, gigabit ethernet, and Wi-Fi 802.11ac.
- It has a card reader. I didn’t realize it but I did miss it after using my 2016 Macbook Pro.
You’re pretty much stuck with the CPU and ram. Both are soldered. You can however, upgrade the HDD. There’s two ways to do it. Open it up and swap it out – which looks laborious from the videos I’ve seen. Or you you can boot off one of the USB3.0 ports. I did the latter. I had an old Samsung 830 SSD lying around.
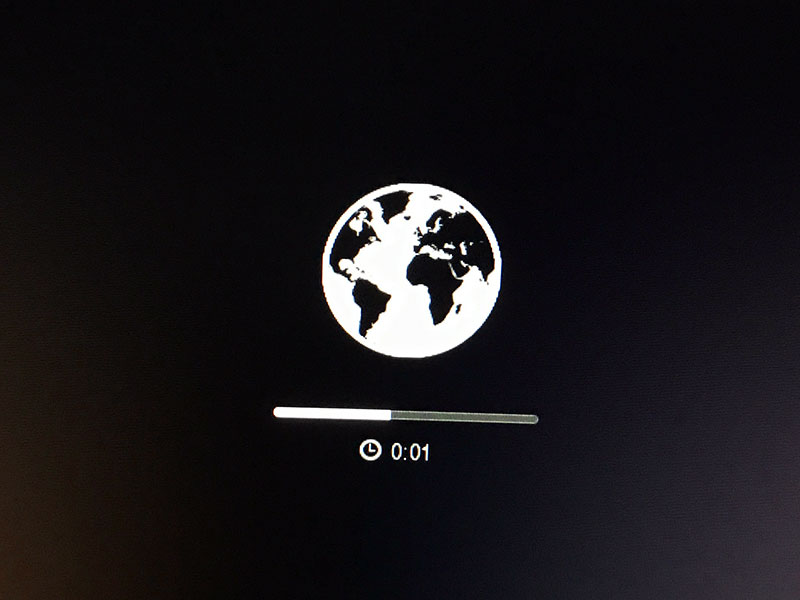
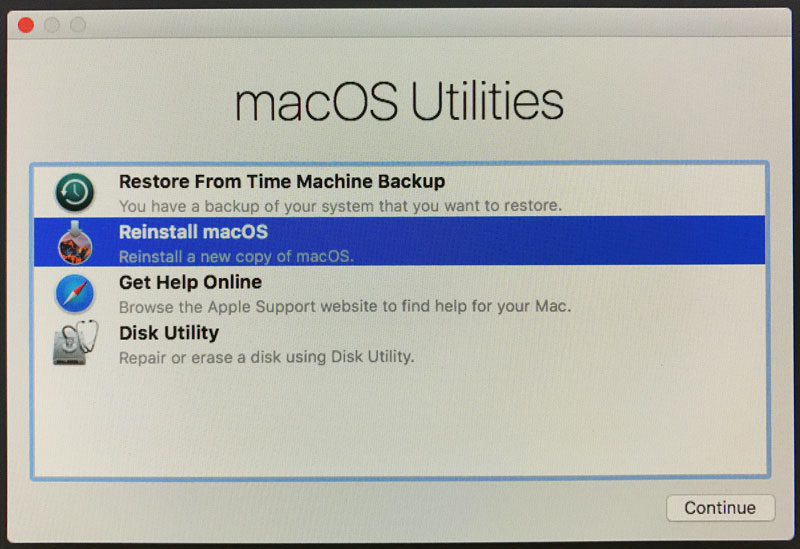
Check out https://support.apple.com/en-us/HT201255 to view boot options. I used Option-Command-R to recover macOS over the internet.
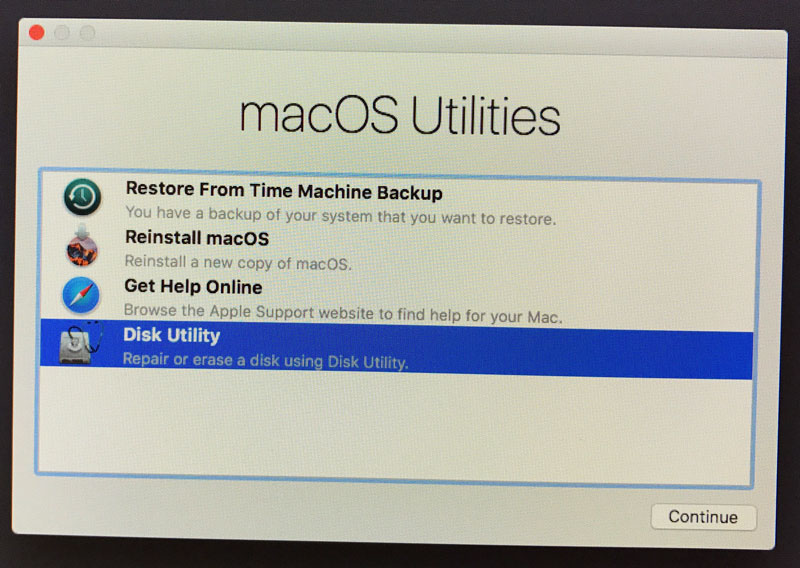
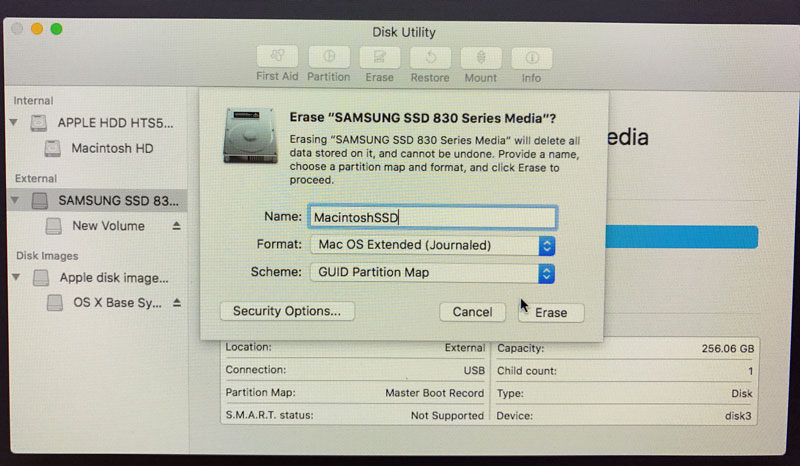
Next, choose Disk Utility from the list so you can format the SSD.
Select the SSD from the list on the left. Select Partition on the top. Provide a name. Make sure the Format is Mac OS Extended (Journaled). Scheme is GUID. Then erase. I assume you know what happens when you do this, right? Remember, it will delete everything on that SSD.
Quit out of Disk Utility. Now Reinstall macOS. It will connect to the internet and get a copy then install. If you are not using the ethernet port, it should’ve asked you to pick from the wireless network it detected and enter the password if applicable.
Normally, the external drive is the yellow one. But just in case, I named my different – “MacintoshSSD”. You should see both drives in the next screen. Make sure you select the USB SSD drive.
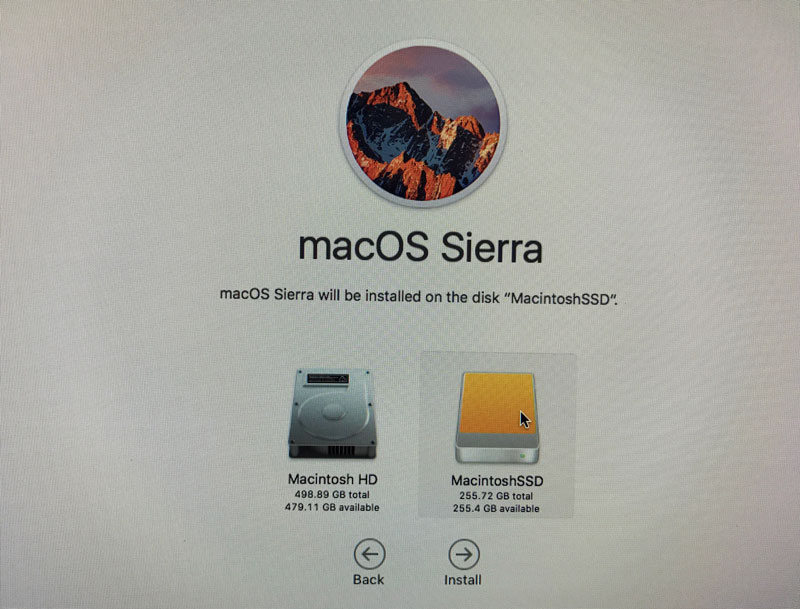
That’s pretty much it. Grab a coffee or beer. It’s going to take around 15 minutes or so. I would suggest the following once you’re finished.
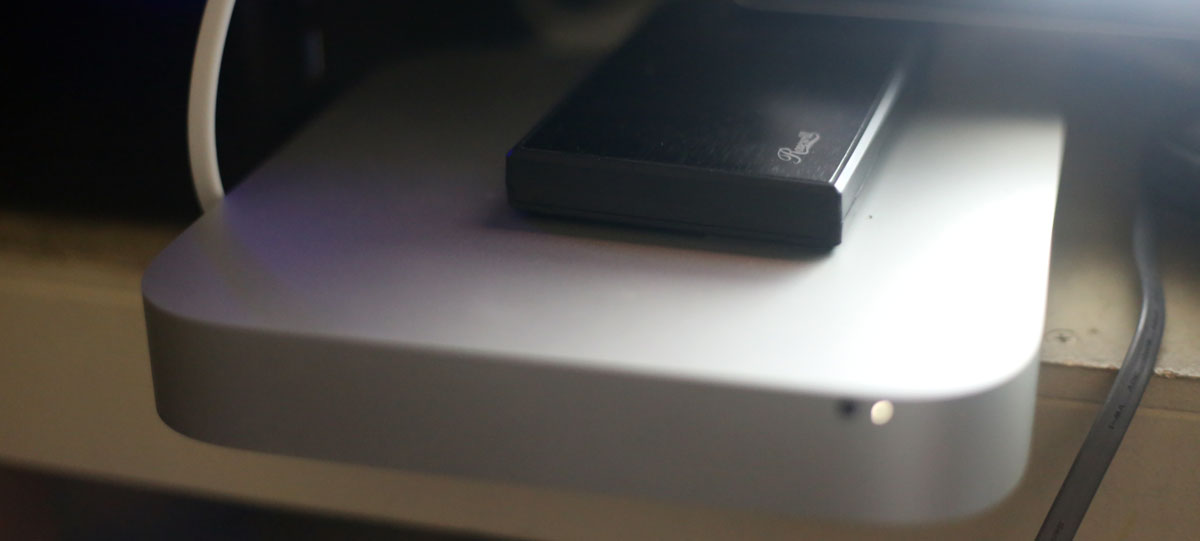
- Get something to fasten/affix the USB enclosure on the Mac Mini to prevent any movements. It could also help accidental disconnects. I used double-sided velcro. That way I can remove it with ease.
- Format the original 500GB drive. It shouldn’t boot off it unless it doesn’t detect the SSD. Besides, you won’t need to boot off it anyway. Just use it for storage. You can also use it for Time Machine. Since we all back up our data, right?
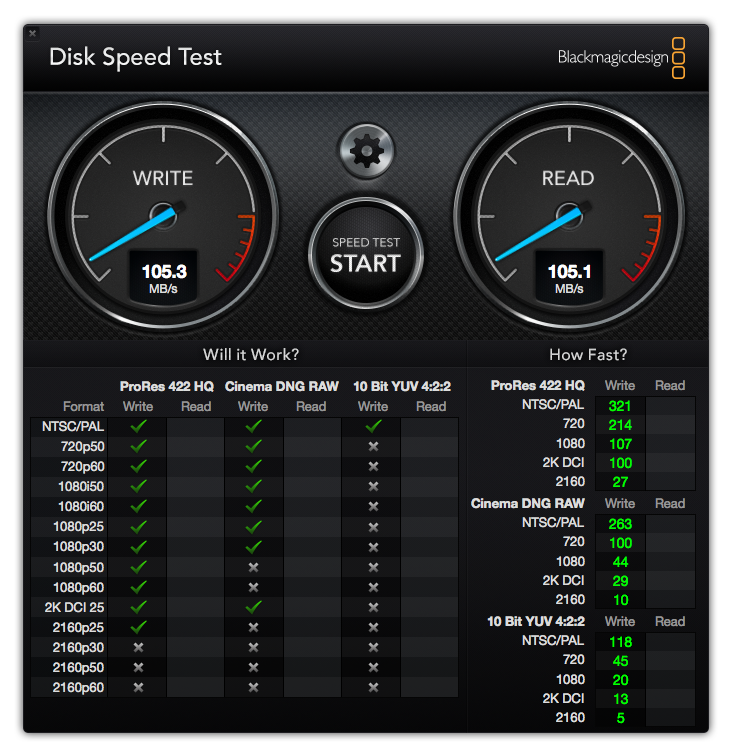
By doing this I tripled the hard drive performance without opening up the Mac Mini.

I was actually working on Hackintosh. I thought the process improved. It did, but there was still some challenges – even if you go off a recommeded parts build. Here’s my list https://pcpartpicker.com/list/kMKPhq. I ended up return most of the parts. But some were used off eBay so I couldn’t. For less, I got an Apple computer and it works flawlessly.